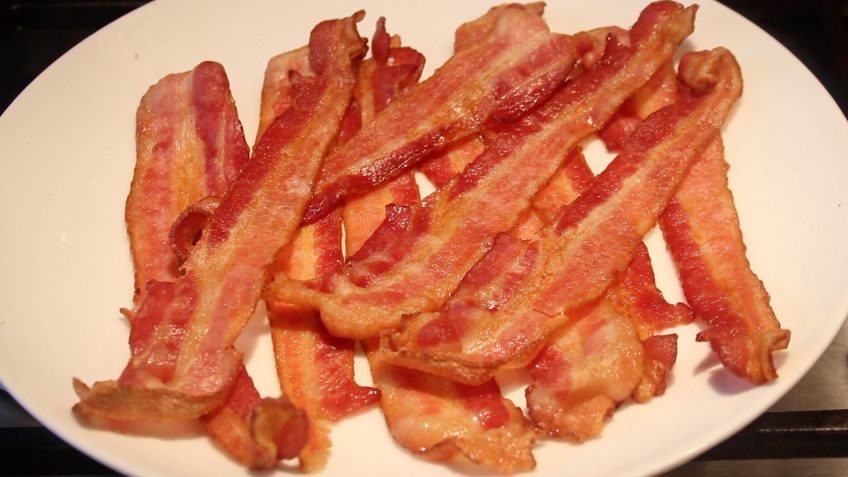
450 g (1 lb) thick cut bacon (natural, with no added sugar, honey, or other sweeteners)
DIRECTIONS
1. Preheat the oven to 200°C (400°F)
2. Arrange the bacon strips, in a single layer, directly on a cooling rack or directly onto the oven rack: Place the bacon close together but not overlapping because the bacon may get stuck together in the baking process.
3. Bake the bacon for 10 – 15 minutes or until golden brown, the exact time will depend on the thickness of your bacon and how crispy you like it. If doing only one rack, put the rack in the middle of your oven. In this position the heat will be evenly distributed and you will get the best results. IMPORTANT – place a baking tray one or two rungs underneath the rack holding the bacon. The tray will catch the bacon fat which you can then store in a glass Mason jar and use for other recipes. Check after about 8 – 10 minutes.
NOTE: If doing two trays of bacon at the same time, place the top rack about a third of the way from top and the second tray a couple of rungs lower, with the baking tray catching grease below the two racks of bacon.
4. The bacon fat will sputter and bubble as the bacon cooks, but shouldn’t splatter the way it does on the stove top. Pour off the bacon grease as needed.
5. When done, remove the tray(s) of bacon from the oven, let sit for a minute or two so the bacon will finish crisping up, then using tongs transfer what you want to serve onto your plate. Let the rest cool. Store leftover bacon in a glass, airtight container. The bacon will keep well for a week in the refrigerator or you can also freeze the bacon for up to 3 months. To serve after refrigerating or freezing, warm the bacon in either the microwave, or a preheated oven, before serving.
6. Clean up: If you want to save the bacon grease, let it cool slightly, then pour it into a container and refrigerate. If you don’t want to save the grease, let it solidify on the baking sheet first for easier handling.
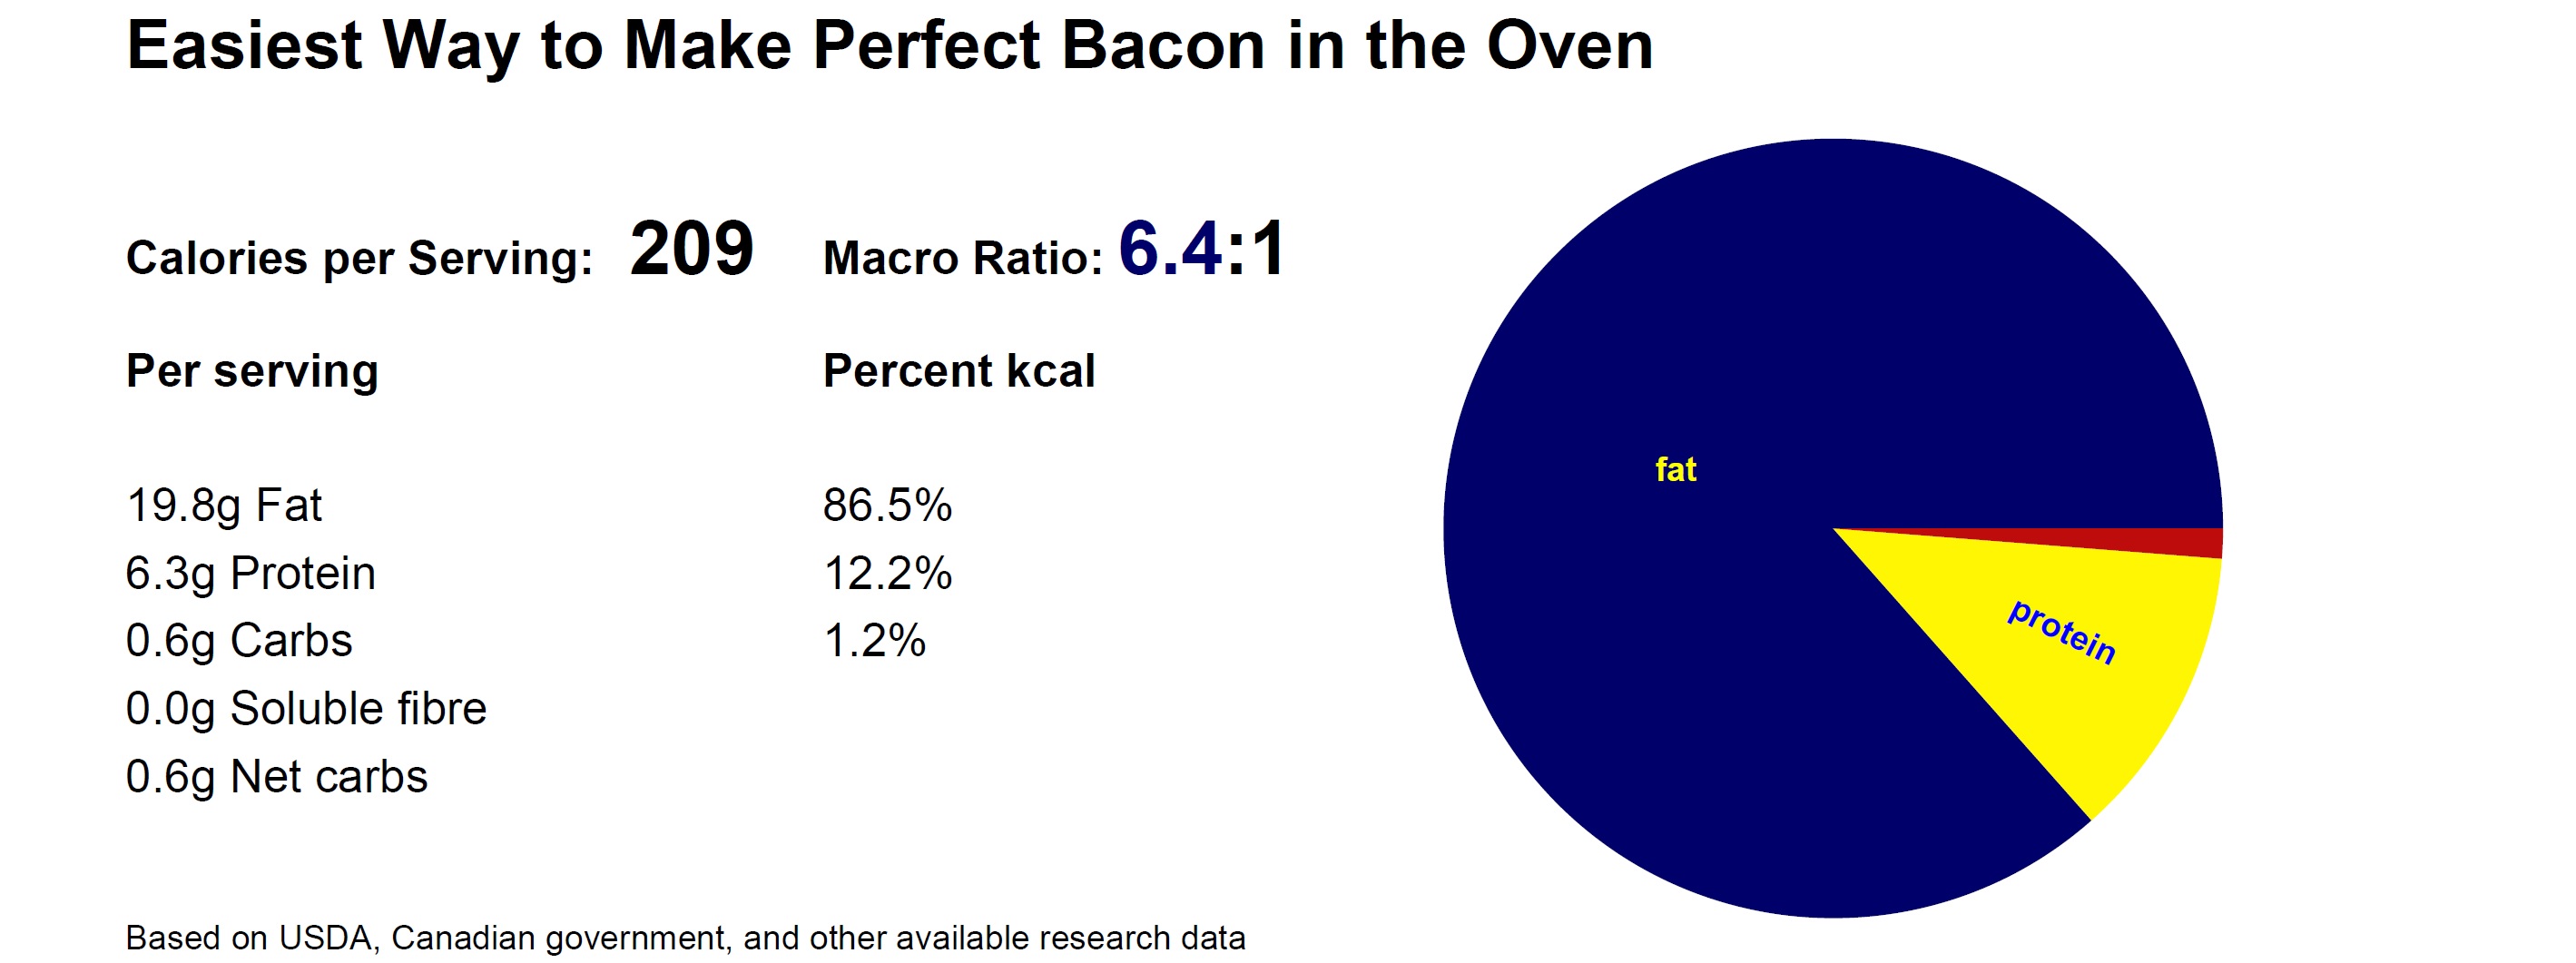
MACRONUTRIENTS CHART
FYI
If cooking just for myself and I only want two or three slices, I use a skillet instead.
Then why cook bacon in the oven?
It is very easy to make (But do use a timer!)
You can make a big batch of bacon (400+ g/1+ lb) at one time
By using two racks, spacing one about a third of the way from the top and the second a couple rungs lower (with the cookie sheet directly under the second rack) you can make two batches at a time. However, you have to keep an eye on the top rack since it is now typically hotter than the other. It may be a good plan to rotate the two racks half way through so both racks can be done evenly.
It is a very time-efficient way to make a big batch of perfect bacon in one easy step
Baked bacon comes out flat and doesn’t curl up if done directly on the racks
The bacon shrinks less
No need to flip or turn the bacon
No grease splatters on the stovetop
The collected bacon fat can be strained and saved by storing in a glass Mason jar to be used for other recipes. It is easier to pour while the bacon fat is still warm.
You can multitask by using the stovetop for preparing the rest of your foods while the bacon is in the oven
Also, it is less messy than frying bacon on a cooktop. In the oven, there is minimal mess and clean-up is very easy.
Something I am beginning to do more often is that I buy a nice slab of pork belly and get the butcher to cut it into strips the same thickness as prepackaged bacon slices. When I am about to do the oven preparation method, I lightly salt both sides of the pork belly slices, then let them sit for about 10 – 15 minutes before proceeding. Using pork belly in this way I can control the ingredients added to the “bacon.” This is very important to me as a diabetic because so many packaged bacon strips have some form of sugar added. Also, if you like, you can flavor the pork belly strips with paprika or you can make your own maple flavoring if you are being carful of your carbs and sugar levels. To make the maple flavoring I combine about one teaspoon of melted unsalted butter and one teaspoon of maple flavor extract, and if my children want it sweeter, I add one teaspoon of monk fruit based sweetener. Mix the ingredients well. After arranging the pork belly strips on your rack, using a silicone brush, spread a thin layer on the upper side of the pork belly strips. The rest is as described above.
The pork belly strips are more like pancetta, which in my opinion is like uncured bacon.
 By Angela Wilkes